
Quite blah, ey? Two of these chairs had, at some point, been covered with an Indian looking fabric. So we had two tan chairs, one green, and one red. Not exactly color coordinated. Now, we had decided that we were not getting new chairs until we could get our dream giant dining table that can expand to seat 10 or 12. And we were not going to do that until we could get our first house. We all know THAT is not going to happen for quite some time. So whats a girl to do? Revamp!
We searched and searched for fabric that would work and oh man there were some pretty ones out there....but pricey. To the point that we might have well bought a new chair set. Finally we found a nice jacquard green striped fabric at Hancock's that was on clearance, and I had an extra coupon! And we borrowed a staple gun to complete the project. Oh, and for a little extra cushion we got an extra cushion for each chair seat from Jo-Ann's during their %50 off sale. All in all this came out to a little over $30. You tell me if you think it was worth it.
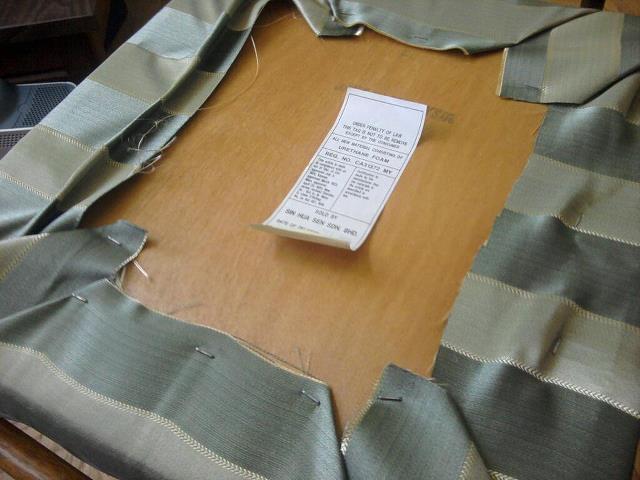
So for the bottom we took the seat off, stuck the extra cushion on top, and wrapped some fabric around to the back like you see here. Then use the staple gun to hold in place. Tip: It needs to be tighter than you might think! Pull pull pull. Flip over, screw into place.
The top was a bit more tricky. We cut out squares, folded in half (right sides together), and sewed two sides and hemmed the open side of what is now a tube. On the open edges we put a couple pieces of Velcro so we could take it off and throw it in the wash if need be. I would have liked to do that too for the bottom but more fabric would have been needed and we are aiming for frugal here. And I'm sorry, no pictures to explain that one. We were getting a little excited. Slip in top piece, screw in place, and you are left with this.

4 matching chairs that are very comfy!
I have to say this was PB's first project and I think he did pretty well. What do you think?
Do what brings you joy!
No comments:
Post a Comment